Strong new home starts and an uptick in hiring in the construction industry means that new insulation contractors are added to company payrolls every day. With the rise of high-efficiency construction driven by certification programs such as HERS, ENERGY STAR, and LEED, quality installation is more important than ever. To combat common insulation installation issues, we look at three typical missteps made by insulation contractors when installing batts and review ways to avoid them.
- Ignoring Manufacturer Instructions – While installing batt insulation may be significantly less complicated or stress-inducing than assembling Ikea furniture, each requires that one read and follow the instructions to achieve a finished product that works. In general, properly installing batt insulation takes some care and attention – particularly if you want to get Grade I. Installers should familiarize themselves with the product, understand the preparation details, make sure they have the right product R-value to meet code, know whether or not a vapor retarder is required, and ensure that the tools needed for the job are on site.
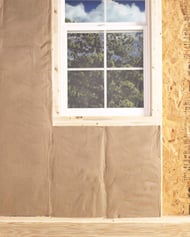
- Haphazardly Stapling Kraft-Faced Insulation – In areas of the country where kraft-faced insulation is used, both inset stapling and face stapling can provide acceptable performance with one note of caution: be careful not to compress the batt during installation. Compressing the batt during stapling can result in air pockets, which can be a concern, particularly with inset stapling. When stapling, be sure to follow the manufacturer’s instructions for guidance on stapling the product along the stapling flange at the side or front of the framing cavity. In general, when stapling faced batts, place the insulation in the cavity, ensuring that it fits completely, then start stapling at the top and work down, using enough stapling to hold the insulation in place and avoid gaps between the flanges and the framing. The photo above is a good example of face stapled batt insulation.
- Ignoring the Details – Cutting and fitting insulation around obstructions like wiring and electrical boxes is essential and ignoring the detailed work of doing so can compromise the insulation’s performance. For wiring, cut the batt and carefully tuck it behind the wiring on top and bottom. Electrical boxes will require cutting out a piece of the batt that is slightly smaller than the box so that the insulation fits snugly around the box without gaping. Note that electrical boxes must also be surrounded by sealant as they are an air leakage area.
While this is not intended to be an all-inclusive list of some of the common installation missteps, this list represents some of the typical problems that can and should be avoided. For new installers or those who bear the responsibility of inspecting insulation jobs at installation, we have a few handy resources to assist you, including:
Our three-part YouTube Video series on installation:
1) How to Install Batt Insulation
2) How to Install Batt Insulation – Tips from the Pros and 3) Batt Insulation Inspection
25 Checkpoints for Inspecting Insulation Jobs
Tech Tips and Critical Details – (English and Spanish)